With the release of Ubuntu Desktop 20.10 being available for the Raspberry PI this week I thought I'd take it out for a spin on one of the Raspberry PI 4's I have lying around. Now, officially you need to use a 4GB or 8GB device, however both of my spare ones only have 2GB so thought I'd try anyway and if things go well look at treating myself to a new shiny 8GB one.
Note: most of this post was written on the 25th however after a mishap (I knocked the PI off my desk and broke the SD Card slot 😒I had to wait until the 31st to complete the .NET 5 test instead running the PI 4 via an old USB SSD)
Initial Install
First off Installing Ubuntu Desktop 20.10 is nice and easy, you can get the image and apply it to an SD Card or for a nice step through wizard the Raspberry PI installer is the way to go. It's a nice four step process, choose Ubuntu and then 20.10 Ubuntu Desktop, choose the destination device and click write. It takes a while to write and verify but once complete you can eject your SD Card and slot it into your PI 4, power up and off you go!.
Disk Speed
A quick aside, I've ended up doing this twice over, usually I use a Samsung Evo 32GB SD Card as I know them to be quick and reliable but initially I thought one of my USB 3 sticks would have performed better so chose to use that. This was a mistake :( If you have multiple USB sticks or even SD Cards I recommend running a benchmark tool against each of them to find the best one to use. My USB stick experience wasn't great and kept having random pauses / stutters. After benchmarking I found my USB stick was not up to any sort of standard. 65MB/s Read... but bare 5.4MB/s write :( I also tested a few of my SD Cards and decided to use one of my Kingston gold cards as although it scored 10MB/s lower in sequential reads its write speed was much higher. Now the 4K performance is often a true tail of random reads and writes for a disk but the test was taking too long so I opted to just base my decision on the sequential tests.
First Boot
The first time I tried to boot just using my Raspberry PI Touchscreen, I can confirm that although it works you will struggle to setup and configure the device. Like most desktop OS' they expect a 1024x768 resolution minimum and without this menu's or buttons get blocked. This was the case for me so I had to switch to a 1080p monitor, not a hardship and actually better for testing the OS anyway but it's worth noting, particulary if you are thinking about Ubuntu Desktop for any small TouchScreen UI's. I will revisit using the touchscreen as I'm sure once configured running a browser or application in kiosk mode would be more than possible.
The initial boot does take a few minutes as the filesystem is resized, but once done you are presented with a short wizard to setup your keyboard, wi-fi, time zone, account and device name.
Once configured theres an additional install process that takes around 10 minutes and a few reboots will occur. The OS is then ready for use.
What can it run?
Ubuntu Desktop comes with a few common applications, Firefox for Web Browsing, Libre Office as well as a few others. Although I'm looking to see if using Ubuntu Desktop 20.10 on a PI 4 would be suitable for my 2 boys (age 9 & 5), web browsing and word processing, I couldn't help but wonder how Visual Studio Code would run, given its now available for arm64 :D
Remote Access
I'll be honest I wanted to finish configuring and testing from my main laptop so my first thing to setup was remote access. First up SSH, I kept with openssh-server. I then tried to using the built in screen sharing / VNC, you enable it via settings. However, after enabling it I couldn't get RealVNC, TightVNC, UltraVNC to connect, they all reported "security setting" issues.
I could have dug into this but remote access isn't my current concern so I decided to switch to RDP instead (which is how I've always connected to Ubuntu running via a Hyper-V VM before I switched to using WSL). To install this open your terminal (or connect via SSH) and install xrdp and enable it.
sudo systemctl enable xrdp
I could then use Remote Desktop Client to connect to the desktop. It's worth noting however that you can only connect if no other user is logged in. I also found I had some weirdness with the gnome desktop but things functioned enough.
Visual Studio Code
With the deb file downloaded you can then open this via the Ubuntu Software installer by right clicking and choosing "Open with Software Install",
or you can use the terminal and use apt install.
mj@mjpi002:~/Downloads$ sudo apt install ./code_1.50.1-1602600638_arm64.deb
I could then launch VS Code from the launcher.
It launched quickly and felt responsive. I even used the terminal within it, again snappy and responsive, I installed git again with no problems.
Running .NET 5
With VSCode running, lets push the boat further and try running .NET 5... Just like installing VSCode this is straight forward, go to go to the .NET 5.0 download page and choose arm64
Follow the instructions and you should find you then have .NET 5 running....
A good experiment is to use one of the dotnet templates, rather than a low spec console application I decided to push things and try the blazor server template.
It literally took seconds, notice how tight I am here on memory, this now begins to really affect things.... however dotnet run gave me after a few minutes....
Once running it was very quick and responsive and I could happily open the source in VSCode and make changes and run them.
dotnet build with no changes, as expected no real time
then a build following a clean, not horrendous, but the limitations of the hardware are beginning to show.
Next up, let's try one of my solutions from work, its not a full app but a set of library packages built into NuGet packages
Ouch. Hitting CPU and memory limits but it did complete.
Code editor looking great though and responsive. No
omnisharp however 🙈
One day maybe...
The 9 Year Old Test
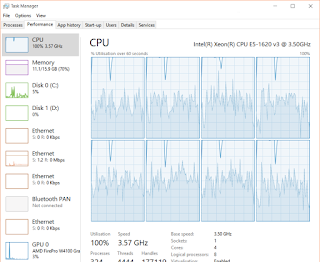
After proving all of the dev capabilities I thought why not let my 9 year old have ago... I had pinched his mechanical keyboard and mouse after all... So turns out his first test was "crazy games" and the CPU got slammed.
But apparently it's faster than his 7 year old laptop so maybe he'll keep it.
Overall Thoughts
I can see a lot of potential with Ubuntu Desktop on the PI 4, it wasn't super fast and slick but it was better than expected. It definitely got better once I swapped from an SD Card to an SSD over a USB interface.
The installation was smooth and fairly quick, getting Visual Studio Code and .NET 5 installed was great and they performed better than expected.
I highly suspect by me running this on a 2GB PI 4 and not a 4GB or 8GB some of the perf issues and stalls I experienced were caused by this. My memory was always running high and I occasionally saw things spooling out to the swap file and at one point even reached it's 1GB default limit. So I can confirm as expected only try this on a 4GB+ version of a PI 4😁


Comments
Post a Comment